This article is a Companion article. Please have a look at the Main article at Sitecore XP1 on Azure using Azure App Service.
In this article, we will complete the following.
- Create a Resource Group
- Create a Storage Account
- Create a Blob Container
- Create a Virtual Machine and configure Azure Storage Explorer
- Download Sitecore Web Deploy Packages and Upload to Storage Account
Step1: Create a Resource Group.
Navigate to your Azure Subscription and click on ‘+’ and search for ‘Resource Group’ as shown below.

You will be taken to the following step.

In the above page, select Resource Group to navigate to the ‘Resource Group’ blade shown below.

Click Create button to create the Resource Group as shown below.

Step2 – Create a Storage Account
Click on ‘+’ and search for Storage Account (like how you did for Resource Group) and click on Create button to navigate to the Create Storage Account blade as shown below.

Notes:
- Please make sure you choose Blog Storage
- Resource Group – Please sure you select the Resource Group that you have created earlier.
- Location – Choose East US – You need to choose the location in which all the Azure services (App Services, SQL Databases, Redis Cache, Application Insights and Azure Search) are available. The deployment might fail if you choose any other location where any of the Azure Services are not available.
Once you are comfortable with the inputs that you have provided click on Create button to create the Storage Account as shown below.

Step3 – Create Blob container
Click on the Storage Account named sitecorewebpackagessa (it might be different in your case) and click on the + Container button as shown in the below screen capture.

Clicking on the Container button, you will be taken to the following New Container blade.

In the above step, please make sure you select Access Type as Blob. Choosing Private will restrict the access of all the web deploy packages. We would be using Shared Access Signatures for allowing the access to Azure. For more information about SAS, please refer one of my previous articles Azure Storage Account – Configure Security using Shared Access Signature
Click on Create button to create the Container as shown below.

The next step is to download the Sitecore Web deploy packages and upload them to the above Container. There are multiple ways to upload these files. The fastest way (if your internet is slow) is to do that from an Azure Virtual Machine and upload them to the Storage Account that we have created above.
If you are new to Azure VMs and would like to learn how to create VM, please go through the Create A New Virtual Machine Using The New Azure Management Portal article to create a new Virtual Machine and do a remote desktop.
Once you log into the Virtual Machine, download Azure Storage Explorer and login to your Subscription.
Download the Web Deployable packages from the Official Sitecore website. Navigate to Download Options for Azure App Service section of the Sitecore Experience Platform 8.2 Update-2 – (It just took 2.5 minutes for me to download the file in the Azure VM)
Unzip the Sitecore 8.2 rev. 161221 (WDP XP1 packages) file. It should have the following files

Now, let’s navigate to the Storage Blob Container as shown below using Azure Storage Explorer

Clicking on Upload button will show the following options.
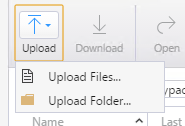
I have chosen Upload Files option which brings up a popup as shown below.

Click on the ellipses (…) button and select all the 4 zip files and click on Upload button to start uploading the packages to the Azure Storage Container. It just took 3 minutes to upload the Web Deploy Packages to my storage Account.
Below is how it looks once the uploading is complete.

Let’s navigate and view the files in Azure Management Portal as shown below.

Do you like this article? If you want to get more updates about these kind of articles, you can join my Learning Groups
Discover more from Praveen Kumar Sreeram's Blog
Subscribe to get the latest posts sent to your email.

One comment