In this article, we will learn how to install Sitecore Instance Manager.
Without providing any basic details about Sitecore and its components, I’m directly diving into installation of SIM 1.4 tool.
SIM is available as a ClickOnce application , and allows you to download and install any version of Sitecore and manage instances of Sitecore on your machine. This is an essential tool for development environments. It also bundles many other handful apps like Log Analyzer, Config Builder and NuGet Generator.
(Ref: http://sitecore-community.github.io/docs/sitecore-basics/installing-sitecore/ )
For more details about what is Sitecore, please refer to the Video Sitecore – Fundamentals Overview – Version 8.0 (https://www.youtube.com/watch?v=lUaMeemm404 )
Okay, lets come back to installation part. Please navigate to http://dl.sitecore.net/updater/sim/ and download the SIM 1.4. It’s a ClickOnce installer that installs the application.

Click on “Install and Launch” button of the above screen capture. Below is the screen capture of the downloaded file.

You might receive a warning something as shown below.

Click on “Install” button to start the installation process. It starts downloading the required files as shown below.

As soon as you download all the required files, you will be redirected to the following URL
https://github.com/Sitecore/Sitecore-Instance-Manager/releases/tag/1.4.0.383
and an installation wizard will appear as shown below.

As noted in the above screen capture, please make sure that you have the following prerequisites
- IIS 7.X
- SQL Server 2008+
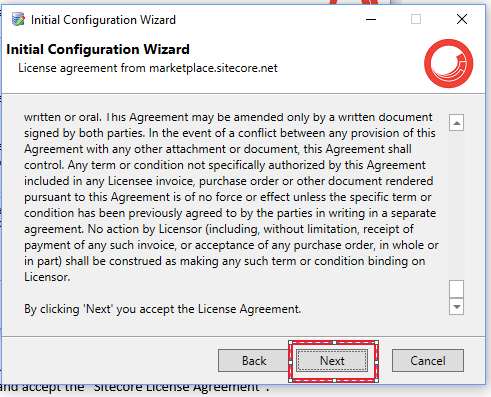
Click on “Next” button of the above step to navigate to the following window where you would be required to read and accept the “Sitecore License Agreement”.
Clicking Next in the above screen will take you to the following screen where you need to select the folder in which you would like to have all the Sitecore applications to be hosted on your local machine.

In the above step, I configured to have all the Sitecore apps to be in my D drive. Click Next to go to the next step where you configure local repository and provide the Sitecore license.

In the above step, you configure the following two things.
- CMS Site: Select the folder (a local repository) to store all the Sitecore CMS site related files and binaries.
- Sitecore License: This is the Sitecore license file. You need to be either a Sitecore partner or you should have purchased Sitecore license to get this file.
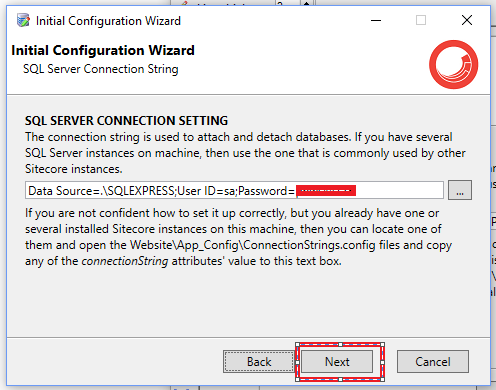
Once you provide both the details click Next to navigate to the step where you configure the SQL Server.
In this step, you would configure the details about your SQL Server Instance as shown below.
As shown below, the next step is to provide the required File System permissions for the Network Service account. For this, click on “Grant” button to let the Wizard provide the permissions.

Clicking on the Grant button will provide the required permissions and show a confirmation window as shown below.

Click OK button of the above window and then click Next in the File System permissions window to go to the final step as shown below.
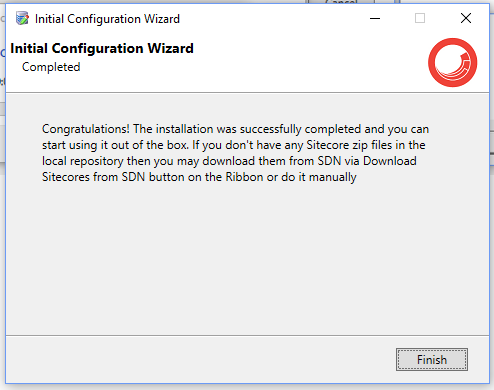
Clicking on Finish button will open the Sitecore Instance Manager as shown below.

We will discuss how to install an Instance in the upcoming article.
Do you like this article? If you want to get more updates about these kind of articles, you can join my Learning Groups

Hi Praveen, Install instance is disable. Tried to do: Home -> Bundled Tools -> Download Sitecores button to download them. but revived unhandled exception happened during downloading ‘https://dev.sitecore.net/~/media/EB50953E80EC46EFB11EB283050AC3D1.ashx’ file. can’t solve this.
LikeLike