In this article, we will learn how to create directory and upload files.
Please go through the following articles to understand more about Azure Storage and its services.
In this series of articles, we will learn how to create an Azure File Share, store some directories / folders, and store few files in those directories, as shown below.
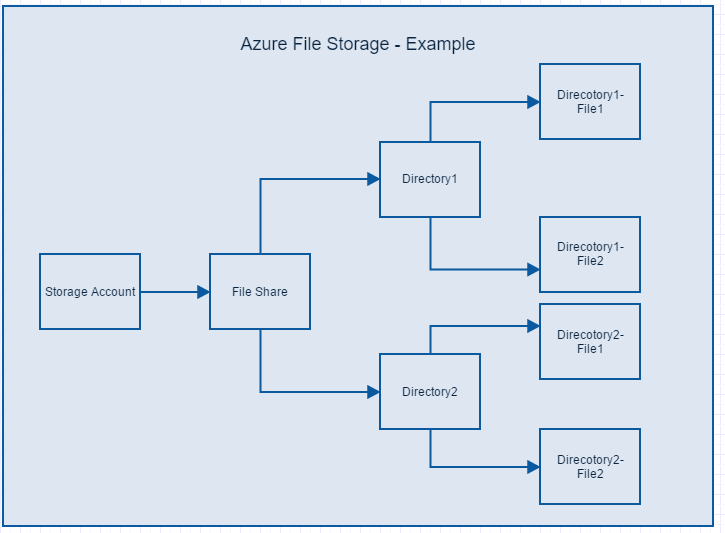
Let’s create Directory and Files within those directories.
Navigate to the File Share listing blade as explain in my previous article Azure Storage – File Share – Introduction

Click on the File share to which you would like to create the directory and upload the files.
Create Directory:
After navigating to the File share details blade, click on the Add Directory button as shown in the below screen capture.
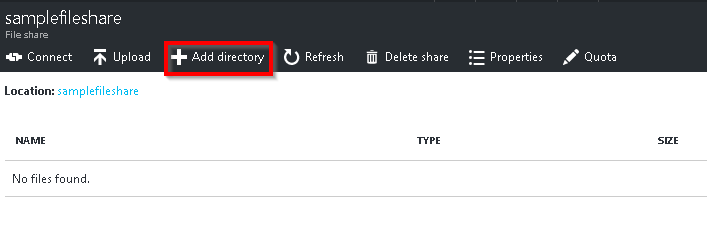
You will be taken to the New Directory blade as shown in the below screen capture.

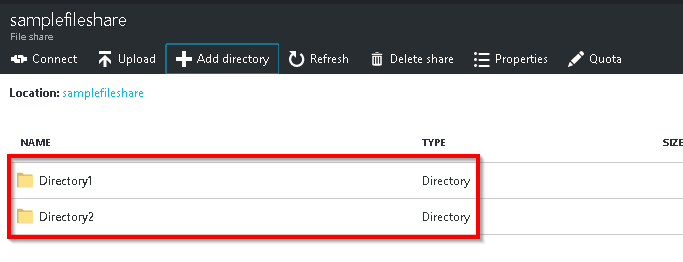
Please provide a meaningful name to the Name field and click on Create button in the above step.
For the sake of this article, I created the following two directories shown below.
Upload a File to an existing Directory: Navigate to the directory to which you would like to add files and then click on Upload button as shown below.

Clicking on the Upload button you will be taken to the following Upload files blade.

You can use the Folder icon (highlighted in the above screen capture. You can choose multiple files at once and click on Upload button to asynchronously upload the selected files. In the above example, I selected two files to upload to Directory1.
Below is the screen capture of the Directory1 listing.

In the same way, I uploaded two other files to Directory2 as shown below.

Summary: we have learnt the following.
- Create a Directory in a File Share
- Create a File in a Directory.
Hope you enjoyed reading the article. Your feedback is appreciated.
Discover more from Praveen Kumar Sreeram's Blog
Subscribe to get the latest posts sent to your email.

One comment