In this article, we are going to learn how to setup SFTP natively using one of the PaaS offerings named Azure Storage / Azure Data Lake Gen2.
Introduction
Every business needs a way to push files to a remote location for securely sharing files with their partners or employees working in the organization.
All these years there was no native Platform as a Service offering for SFTP in Azure. However, there were workaround using Virtual Machine or Container Instances for configuring the FTP solutions. Recently, Microsoft Azure announced a Preview feature called SFTP inside Azure Data Lakes.
In this article, we are going to learn how to setup SFTP natively using one of the PaaS offerings named Azure Storage / Azure Data Lake Gen2.
Prerequisites
SFTP is a Preview feature and can be enabled to use at Subscription Level.

If you don’t see the SFTP support for Azure Blob option as shown in the above screenshot, you need to enroll for exploring the preview feature using this form.
SFTP feature is available only in the below regions currently.
- North Central US
- East US 2
- Canada East
- Canada Central
- North Europe
- Australia East
- Switzerland North
- Germany West Central
- East Asia
- France Central
If you are trying to work with SFTP in a Storage Account which is not in the above list, then SFTP won’t work as expected.
Finally, install any of your favorite FTP Client tools. In this article, I’m using WinSCP tool to connect to SFTP
Alright, it’s time to get started working with SFTP.
Let’s get Started
Navigate to Azure Management Portal and create a storage account. Once you provide a Name to the storage account and choose one of the locations specified above, choose the below settings in the Advanced blade .
- Enable Hierarchical namespace – Check this checkbox to enabled the Enable SFTP checkbox.
- Enable SFTP – Check this checkbox to start using the SFTP feature.
Go head and click on Review + Create and create the Storage Account.

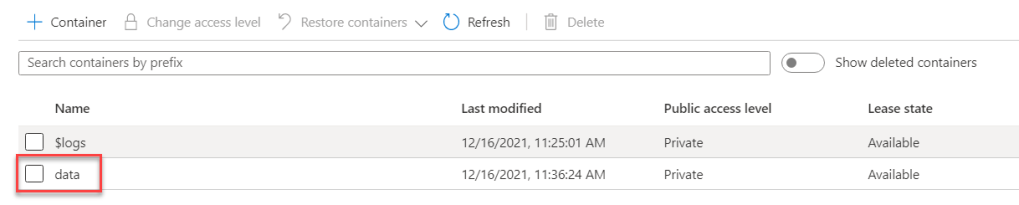
Create Container.
As shown below create a new container named data as shown in the below screenshot. Later, in this article, we will discuss on how to make this data folder as a ftp location that can be used using FTP client.
Configure SFTP
Once the Storage Account is created, navigate to the SFTP blade by clicking on the SFTP menu item as shown below.

In order to get started working with SFTP, we need to create local users and configure permissions by following the below steps.
Add Local Users
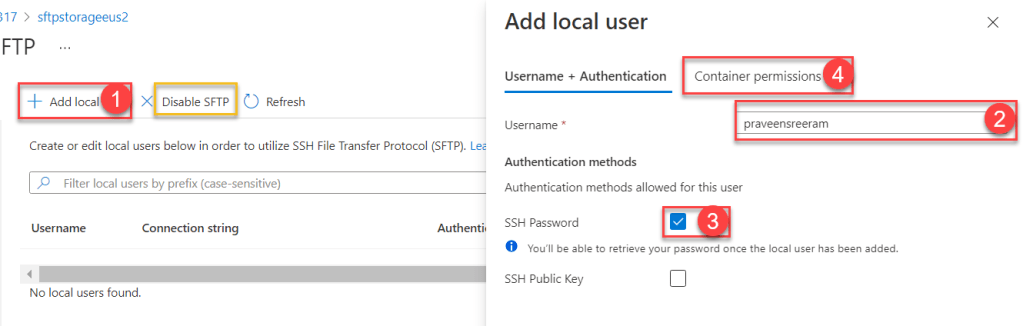
Perform the below steps as specified in the above screenshot.
- Click on the Add local user button
- Provide a username (this username will be used to login with SFTP client.
- You can choose SSH Password / SSH Public Key for authenticating.
- Click on the Container permissions to configure permissions for this user.
Configure Permissions

As shown in the above screenshot, choose the container(s) on which you would like to allow the users and then choose the permissions and also choose the default directory to get connected automatically when the users use FTP tool.
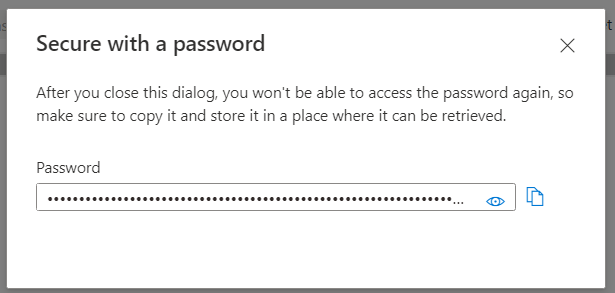
Once you provide all the details, click on Add button as shown above. As soon as the user is created, a popup will be shown which displays the Password. Please note the password and save it securely as you can’t get it later.
Connect to FTP using FTP Client
Let’s now open the WinSCP tool to connect to Storage Account. You need the below two to successfully connect.
- SFTP Connection String – You can retrieve it in the SFTP blade.
- Password – Already copied the password.
In the WinSCP too, click on New Session which opens up a Login Window where you need to provide both the Connection String and the Password in the WinSCP as shown in the below screenshot.

Notes:
- Once you paste the connection string in the Hostname field, it automatically removes the username and filles the Username field.
- Ensure that the Port number is 22.
Finally, click on the Login button and you will be connected to the SFTP. However, you may get an error that a folder Home doesn’t exists as we didn’t create a folder in the data container. Click on the parent icon to navigate back to the root folder which is the data container that we created in one of the steps.
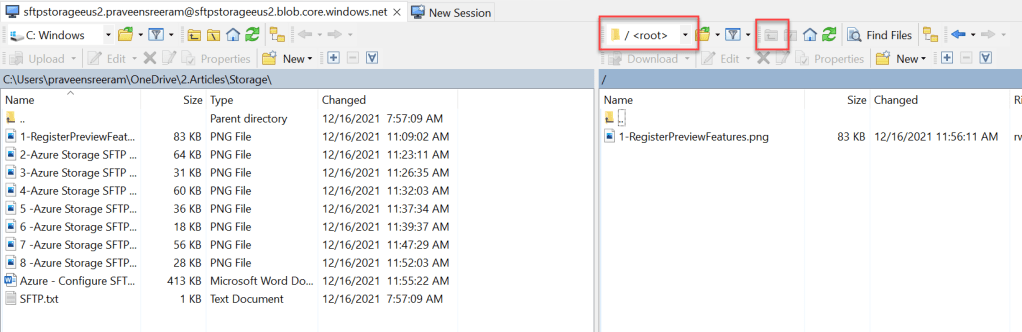
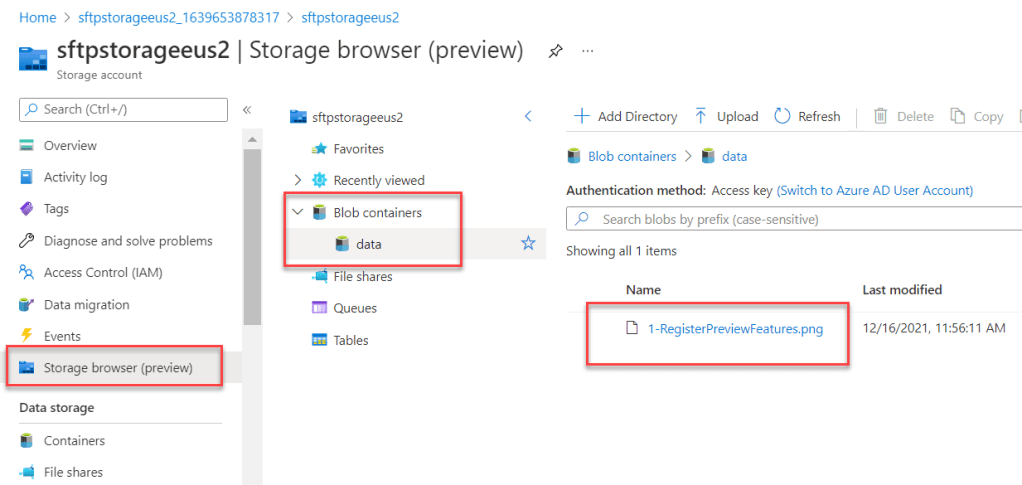
As shown above, I dragged and dropped a file named ‘1-RegisterPreviewFeatures.png’ from my local machine to FTP location.
Let’s navigate to the Storage Account and see that the file is available as shown below.
That’s it. We have learnt how to configure SFTP natively as a PaaS offering without worrying on the infrastructure or maintenance of the same.
Thanks for reading.
Do you like this article? If you want to get more updates about these kind of articles, you can join my Learning Groups
Discover more from Praveen Kumar Sreeram's Blog
Subscribe to get the latest posts sent to your email.
