
Today, we will learn how to promote a simple Azure Data Factory pipeline along with other components (Linked Services, Data Sets etc.) from a development environment to higher environments like Staging & Production.
In this article, we will learn how to implement this manually. In the next article Azure Data Factory – Automated deployments (CI/CD) using Azure DevOps we will learn how to automate the process using Azure DevOps.
Let me start by listing down the prerequisites. Create the following Azure services that the ADF pipelines would be using.
| Resource Groups | Azure Data Factory | (Logical) SQL Server | Azure SQL Database | Storage |
| adf—rg | adf—adf | adf–dbserver | adf—db | adf—strg |
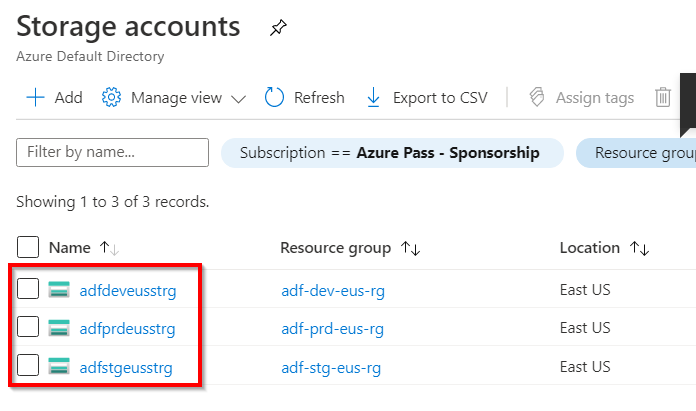
Below is the list of all Azure Resources that I have created using Azure Management Portal.
Resource Groups

Azure Data Factory Instances

(Logical) SQL Servers

Azure SQL Database

Azure Storage Accounts
Author Azure Data Factory Pipeline in the Dev Environment.
- Navigate to the Azure Data Factory named adf-dev-eus-adf (in your case name would be different) of Dev Environment.
- Create a new ADF Pipeline
- Create two Linked Services
- A Linked Service for Storage Account
- A Linked Service for Azure SQL Database
- Create two Datasets
- A Dataset for the Source Blob
- A Dataset for SQL Database table.
- Create a Copy Data activity and configure the Source and Sink Linked Services and Datasets for copying the data from the Blob to the Table.
As explained in the below video, create a pipeline with the above steps.
The general practice that any developer would follow is to develop /author the ADF pipeline in the Development Environment. Once the functionality is validated, we need to promote the ADF pipeline and its components (Linked Services, Datasets etc.) to the next higher environments without authoring again.
Note: In this article, we will learn how to promote ONLY the ADF pipelines and its components but not the Azure Services like Azure Data Factory, Storage and Azure SQL Database
If you would like to automate the process of promoting the pipelines, refer Azure Data Factory – Automated deployments ( CI/CD ) using Azure DevOps
Once you complete the authoring of the ADF pipeline, it should like something as shown below.

We are now done with the authoring in the Development environment. Let’s start the process of promoting the ADF pipeline and its components by following the below steps.
Export the ARM Template
From Azure Data Factory V2 (version2) onwards, ARM Templates are supported for creating the ADF pipelines and its related components. Let’s export the ARM template of our ADF pipeline by clicking on the ARM Template and then on Export ARM template as shown below.

If you are using Chrome browser then you should have the .zip file downloaded as shown below.

Go-ahead and un-zip it as we will be using the files in the next section. Once you unzip, it should look something as shown below.

Import the ARM Template to the Stating ADF service
We are now ready to promote services to the next higher environment. Navigate to the ADF service of your next Environment (in my case it is adf-stg-eus-adf) and click on ARM Template and then Import ARM Template as shown below.

You will be taken back to Azure Management Portal in a new browser window to the Custom deployment as shown below.
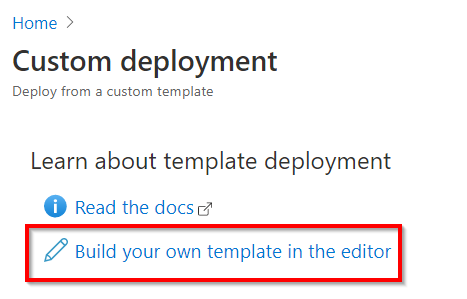
As shown in the above screenshot, click on Build your own template in the editor button which takes you to the below screenshot.

Click on the Load File button as shown in the above step and choose the Template file that we have exported from the Development environment’s ADF service.

As soon as you select the template file it will be loaded as shown below.
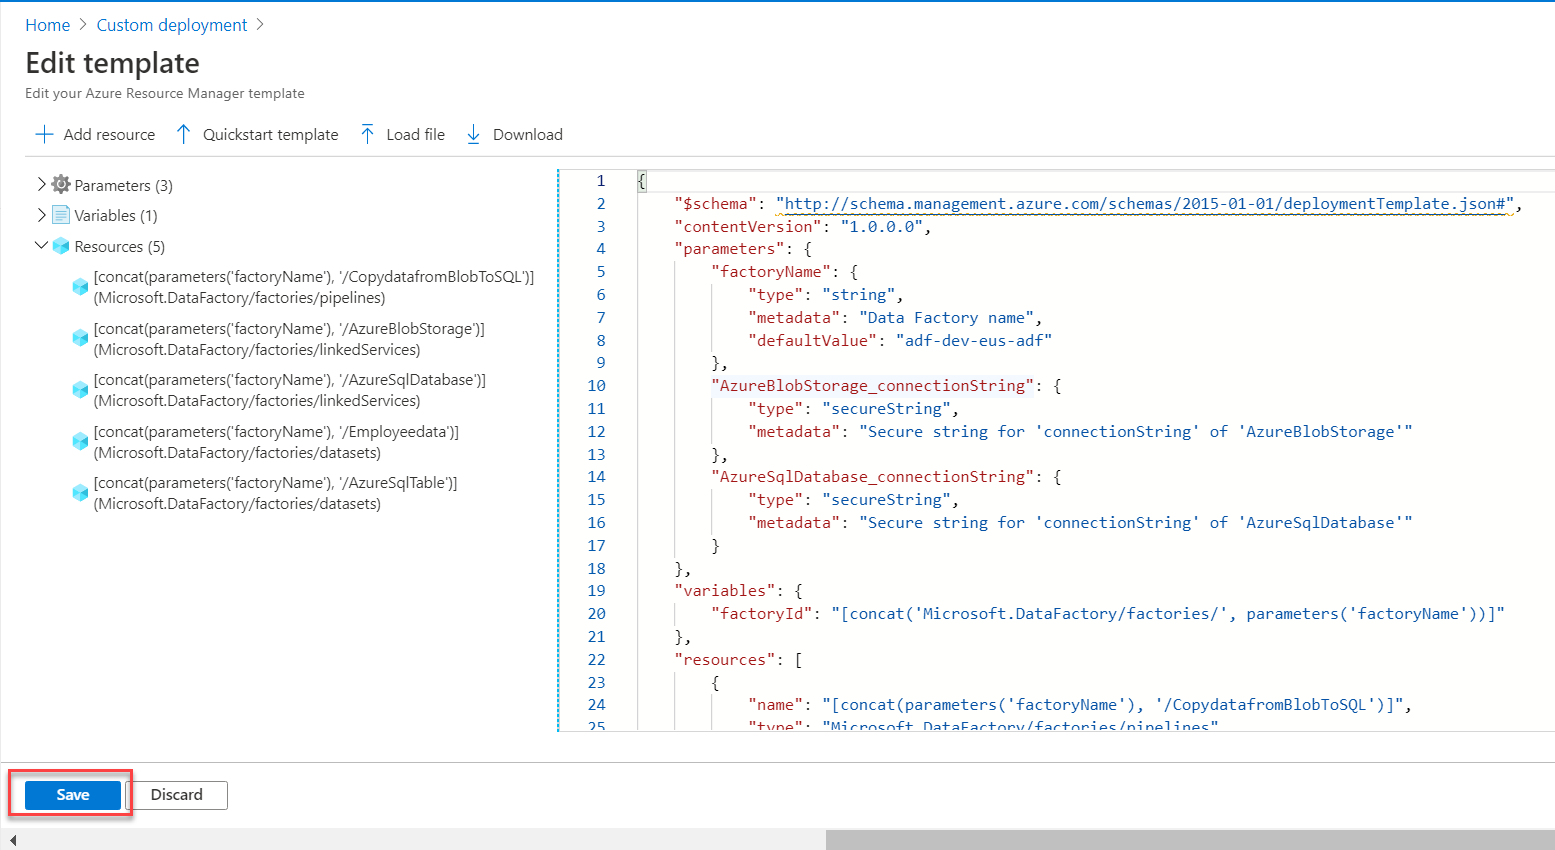
Once the file is loaded, click on the Save button as shown in the above screenshot. And then, you will be taken to the next step where you can provide Environment specific settings like Storage and Database connection strings of your staging environment as shown below.
Configure Staging properties
As shown in the below screenshot, provide the Environment specific settings.
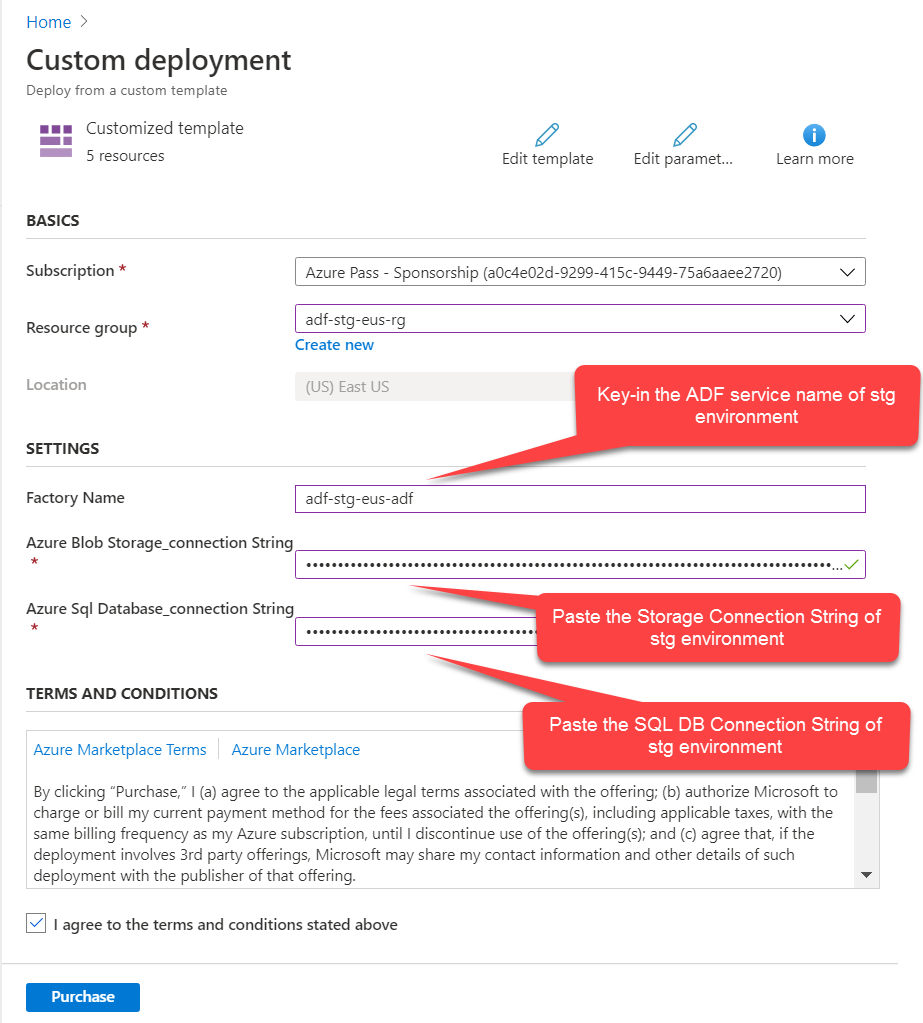
Once you provide the environment specific configurations, review and then click on Purchase button available in the above step. If everything is configured properly, the ARM templates will be published immediately.
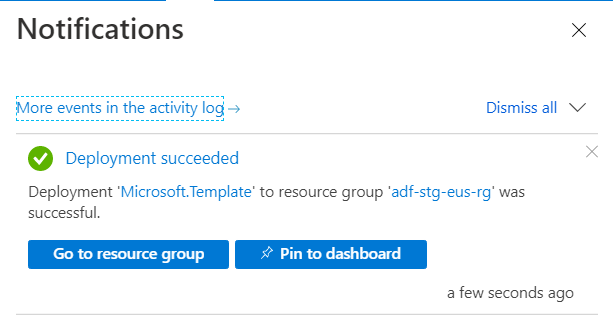
Below is the screenshot of the status once the ARM gets published.
And, if you now navigate to the Data Factory instance of Staging Environment then you should see all the pipeline and it’s related components as shown below.

Summary:
In this article, we have learned how to promote the ADF Pipeline and related components (but not the ADF service itself) from Development environment to another higher environment say Staging Environment
- We have built a simple ADF pipeline
- We have created Linked Services and Datasets for Azure SQL database and Storage Account
- Exported the ARM Template from the Development Environment
- Configure Stage Environment setting in the ARM Template
- Import the ARM Template in the Staging Environment.
Next Steps:
- You can save the credentials in Key Vault
- You can automate the process of creating of the Azure Services (like ADF, Storage and SQL Databases) using ARM Templates.
Do you like this article? If you want to get more updates about these kind of articles, you can join my Learning Groups
Discover more from Praveen Kumar Sreeram's Blog
Subscribe to get the latest posts sent to your email.

2 comments