In our previous article listed below, we have learned how to create a Long term retention backup of an Azure SQL Database which lasts for 10 years.
In this article, let see how to restore the backup taken as part of Long term retention backup. Navigate to the SQL Servers for which you have configured the Long Term retention backup as shown below.

The essentials blade lists all the databases associated with the selected logical SQL Server as shown below.

Click on the required database. In your case, there might be multiple databases. You need to choose the right database that you would like to restore.

Now, click on Restore button as shown in the above screen capture.
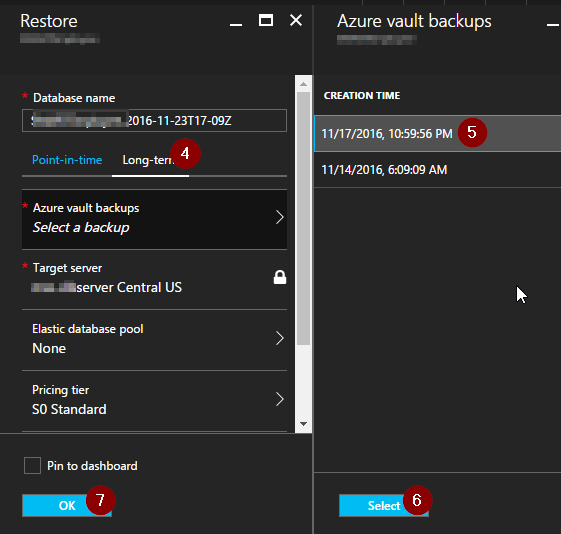
In the above Restore blade, click on the Long-term tab to choose the required settings. Below are the settings that we would need to choose.
- Database name – Provide a name for the new database that gets created as part of Restoring process.
- Azure Vault backups – We need to choose the Backup using which we would like to restore.
- Target Server – As of this writing, we can restore the database within the same SQL Server from where the database is backed up.
- Elastic database pool – In case if you would like to associate the new database in an Elastic pool.
- Pricing tier – In case if you would like to change the Pricing Tier of the new database that gets created as part of the restoration process.
Once you are ready with the all the details, click on “OK” button.
After a couple of minutes (depending on the size of your database, it might take hours to complete the restoration)
Below is the screen capture of the new database that got created.

Summary:
In this article, we have learned how to restore a database from the backup that was saved in a Backup vault as part of Long Term retention.
Discover more from Praveen Kumar Sreeram's Blog
Subscribe to get the latest posts sent to your email.

One comment