Introduction
Logic Apps provide a way to simplify and implement scalable integrations and workflows in the cloud. It provides a visual designer to model and automate your process as a series of steps known as a workflow.
Ref: https://docs.microsoft.com/en-us/azure/app-service-logic/app-service-logic-what-are-logic-apps
Use Cases:
- Post all the tweets into a Facebook Page automatically
- Download attachments for all your emails and post them into Dropbox
We will learn more about Logic Apps in the upcoming articles.
Please note that we can design and deploy the Logic Apps using Azure Management Portal as well as in Visual Studio using ARM templates.
In order to achieve that we need to install Visual Studio Tools for Azure Logic Apps.
Prerequisites
- Visual Studio 2015
- Azure SDK 2.9.1 or later
Open Visual Studio 2015 and click on New Project à Templates à C# à Cloud as shown below.

And, select Azure Resource Group and provide a meaningful name and click on OK.
Clicking on OK will open the following Select Azure Template where you can choose the built-in templates available with Visual Studio for quickly building the Azure Services. For this example, select Logic App and click on OK as shown below.

Clicking OK will create the Logic App as shown below.

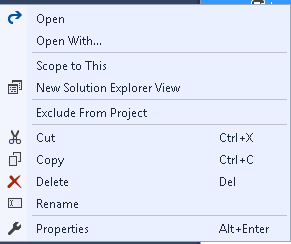
Right click on LogicApp.Json file, you will review the following options. You will understand why I asked you to right click at the end of the article.
In the article Kickstart to Logic Apps in Azure (http://www.c-sharpcorner.com/article/kickstart-to-logic-apps-in-azure/ ), you might have learnt that Azure Management Portal allows you to design the Logic App right in the browser. In the same way, Visual Studio also provides a Visual Designer for designing the Logic Apps.
In order to get the Visual Designer, we need to install Visual Studio tools for Azure Logic Apps. Let’s see how to install these tools right from Visual Studio.
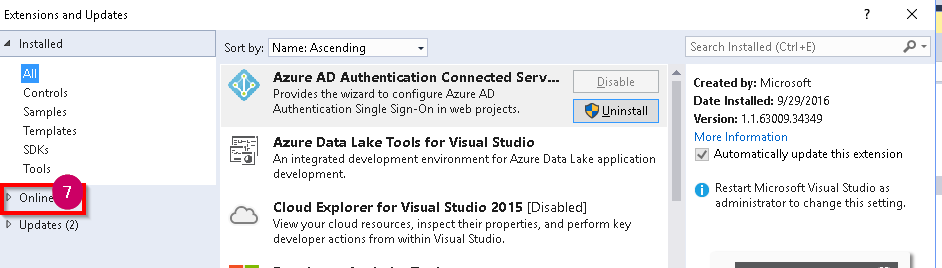
In your Visual Studio, click on Tools -> Extensions and Updates as shown below.

Next step is to select Online as shown below.
And then search for Logic Apps as shown in the below screen capture and click on Download.
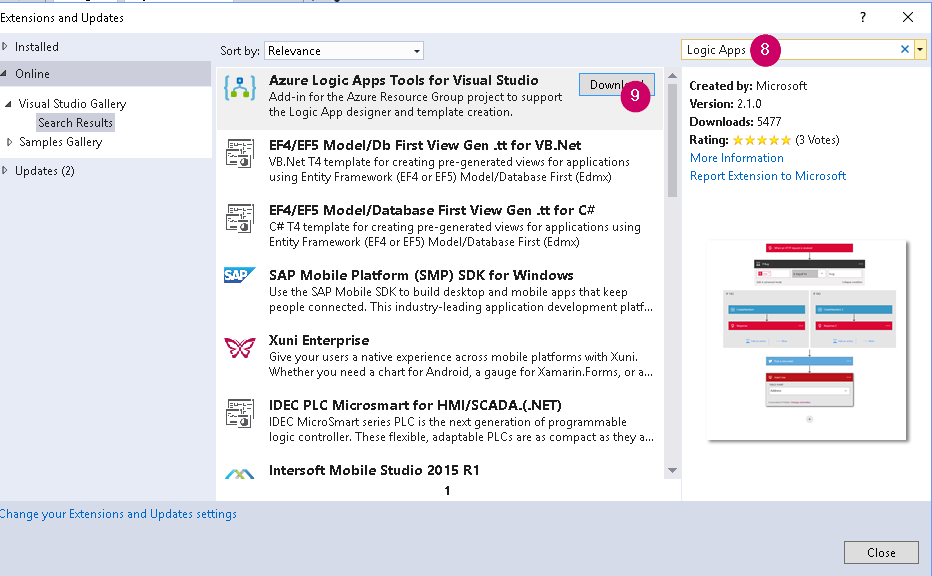
Clicking on the Download button will download the required files as shown below.

Once the process of downloading is finished, you need to review and read the license terms and click on Install button as shown below

After the installation is complete, you would need to restart Visual Studio.

Restart Visual Studio and open the project and now again right click on LogicApp.json file as shown below.

You would notice a new option now Open with Logic App Designer as shown in the above screen capture.
Clicking on the Open with Logic App Designer will open the following popup to connect to the Azure Subscription where you need to choose your subscription and also choose a Resource Group. Once you choose the Resource Group, click on OK button

Clicking on the OK button will show the Visual Designer as shown below.

We will learn how to create Logic Apps in the upcoming articles. Stay tuned!
Hope you enjoyed reading the article. Your feedback is appreciated.
Do you like this article? If you want to get more updates about these kind of articles, you can join my Learning Groups
Discover more from Praveen Kumar Sreeram's Blog
Subscribe to get the latest posts sent to your email.
