In few of the below articles, we have learnt how to develop ADF pipelines in the Azure Management Portal.
- Azure Data Factory – Implement UpSert using Dataflow Alter Row Transformation
- Azure Data Factory – Assign values to Pipeline Arrays in ForEach activity using Append Variable
It was me the only one ADF developer who has developed the ADF pipeline. However, in the project environment where you work with multiple developers in a team, this way of developing the ADF pipeline would not work well. We will need to leverage version control system in collaborating the work between various team members. Fortunately, Azure Data Factory allows us to collaborate work using git supported by the below platforms.
- Azure DevOps
- Github
In this article, we will learn how to collaboratively work on individual tasks and then merge all the work at the end for each release using Azure DevOps git.
Let’s get started by distributing the work of tasks to different developers.
Task1 – Author Dataflow Transformations – By Developer1
- Create Linked Services
- Create Datasets
- Create Dataflow
Task2 – Author Pipeline – By Developer2
- Create ADF Pipeline
- Integrate the Dataflow
Now, in order to have both the developers work on the same Data Factory service, the first step is to integrate the Data Factory service with Git repository. As of this writing, we can integrate ADF with git hosted in GitHub or Azure DevOps git. You can go through Azure Data Factory – 3 ways to Integrate ADF Pipeline with Azure DevOps – Git article to learn how to integrate ADF pipeline with Azure DevOps git.
Once you integrate the Data Factory instance with the Azure DevOps git, you can start working collaboratively with other team members.
Let’s start working on Developer1’s task by creating a new branch by clicking on the New Branch menu item as shown below.

Once we click on the New Branch in the above step, a new popup opens up where we need to provide the name of the branch and then click on the Save button as shown below.

After clicking on the Save button the Task1 branch is created.
Now, open a new browser tab and navigate to the Azure DevOps repository and navigate to the Branches where you can view the branch as shown below.
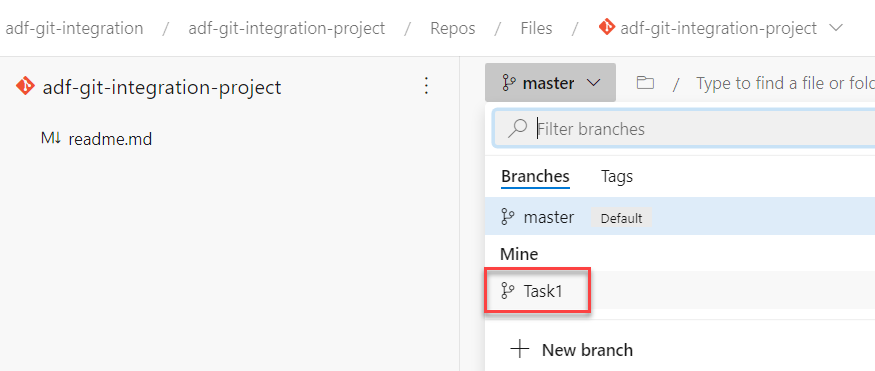
Developer1’s Task
Let’s start authoring the Task1 – which is the task of developing a DataFlow. For this, let’s implement a simple DataFlow that copies the data from a Storage Blob to Azure SQL Database a shown in the below video
Once we are done with authoring the DataFlow, click on Save button as shown below.

And, move to the Azure DevOps and notice that all the changes that you have made are reflected as shown below as soon as you click on the Save button of the above screen capture.

Now that the Developer1’s Task is complete. We need to raise a Pull Request (PR) in order to merge the changes to the Collaboration branch. In order to raise the PR, we need to click on the Create pull request menu item as shown below.

Once we click on the Create pull request menu item in the above screen capture, a new browser window will be opened where you can provide comments and choose a reviewer (you can choose your name for now.) to review the changes and approve the request for merging the Task1 branch changes to the collaboration branch master as shown below.

Once we click on Create button, we will be taken to the next page where we need to click on Approve and then on Complete buttons as shown below.

Once you click on the Complete button a final Complete Pull Request popup will be shown where you can choose to merge and then delete the Task1 branch after the merge operation is successful. For this example, we will not delete the Task1 branch as shown below.

Note: When you are working on your actual projects, your lead (or someone in your team) would review the changes and then merge them into master
Developer2’s Task
Let’s start working on Developer2’s task.
As the Task1 related work is already merged into the master, when you created a new Branch for Task2, you will get the latest from the master as shown below.

Note: One important point to note is that when you create a new Branch now, you will get the latest from the collaboration branch (master). That means, in our example, the Task1 work is merged into master. So, when you create a new Branch Task2, you already all the changes of Task1 as shown above.
Let’s now drag & drop Dataflow task into the pipeline as shown below.
Now that the Developer2’s Task is also complete. We need to raise a Pull Request (PR) in order to merge the Task2 changes to the Collaboration branch as we did for Task1 changes. After the Task2 is merged into master you will see all the changes as shown below.
ADF View

DevOps View

That’s it. We have learnt how to collaborate between different team members while working in our ADF projects.
Below is the summary of what we have learned today.
Summary
How to create branches for individual tasks with the help of Azure DevOps Git
How to create Pull Requests (PR) for Azure Data Factory pipeline branches from the ADF portal
Merge the changes of different branches into the collaboration branch.
Next Steps: Now that we completed the development part, we would need to promote the ADF pipeline to the next higher environment (say Staging). You can learn how to implement the process of promoting to the next environment, you can go through the Azure Data Factory – Promoting ADF Components manually to higher Environments
Do you like this article? If you want to get more updates about these kind of articles, you can join my Learning Groups
Discover more from Praveen Kumar Sreeram's Blog
Subscribe to get the latest posts sent to your email.

If there are more than 10 developers, what is the more optimized way of creating branches or repository folders and implementing automatic CICD using Azure DevOps?
LikeLike
Azure Devops support more than 10 developers
LikeLike
Can multiple developers debug their code at the same time?
LikeLike
Very helpful Articals Sir Thank you so much
LikeLiked by 1 person
Glad that it helped
LikeLike