In this article, we will learn how to configure Azure SQL Database backup that can last for around 10 years.
Introduction
Every business needs a backup policy to overcome the problems of any unexpected failures. There are multiple services that Azure provides us to store the data.
Azure automated backups store the database backups automatically from 7 – 35 days based on the tier you have chosen for your Azure SQL Database.
However, there might be regulatory or compliance requirements where in you might want to store the backups more than a year or so. That’s where one of the new features of Recovery Services comes handy.
In this article, we will learn how to configure Long-term backup retention an Azure SQL database.
Below are the steps required for the configuration.
- Create a Recovery Services Vault. (in the Same Resource Group where you logical SQL Server is located)
- Long-term backup retention – Accept Privacy Terms
- Configure SQL Server (and the databases) to use the Recovery Services vault.
- Create a retention policy.
Step1 – Create a Recovery Services Vault
Search for “Backup and Site recovery” as shown below.

As shown below, select “Backup and Site Recovery (OMS)”.

As shown below, click on “Create” to navigate to the “Create Recovery Services vault”


Please make sure that the location, resource group of the Recovery Services vault are same where the SQL Server and its databases are located.
As shown in the below screen capture, the Recovery Services Value has been successfully created.

Step2 – Long-term backup retention – Accept Privacy Terms
The feature Long-term backup retention is still in preview. So, you need to accept the Privacy terms.
Navigate to the SQL Server for which you would like to configure Long-term backup retention service as shown below.

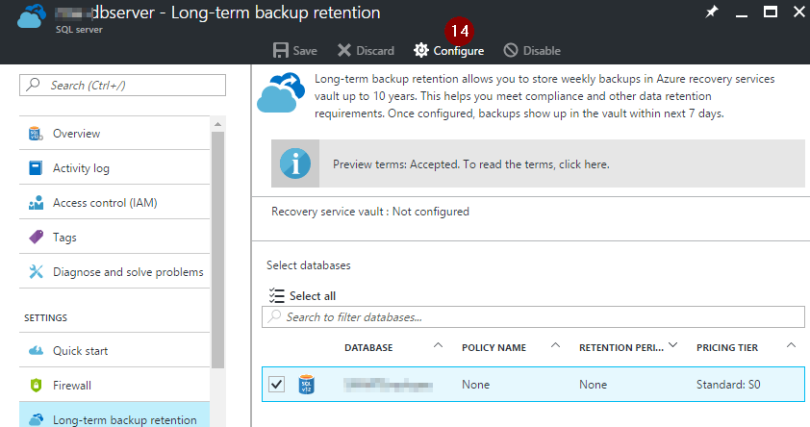
Clicking on the long-term backup retention blade will take you to the following blade.

The Configure button is disabled. You can configure the retention policy only after accepting the privacy terms. As shown in the above screen capture, click on the “Preview terms: Not Accepted. To Sign up for preview, click here” to navigate to the Preview terms blade as shown below.

Click the checkbox and click on “OK” button as shown in the above screen capture. Accepting the terms will enable the “Configure” button as shown below.
Step3 – Configure SQL Server (and the databases) to use the Recovery Services vault.
Click on the “Configure” button as shown in the above screen capture to configure the Recovery Service value. Clicking on the “Configure” button will take you to the Configure blade as shown below.

As shown in the above careen capture, select the “Recovery Services value” and click on the “Select” button.
Step4 – Create a retention policy.
You need to create a Retention Policy or select an existing policy. Currently, we don’t have any policies. Let’s go-ahead and create a new Retention policy by providing a meaningful name and select the number of years you would like to retain the backup. In this case, I have chosen 5 years.

Now, click on “OK” button to complete the process of configuration.

Now, select the databases which you would to retain and click on “Save” button to save the changes. A confirmation box is displayed as shown below.

Click OK to save the changes.

As shown in the above screen capture, a confirmation message is displayed about the retention policy.
You can see the details about the backup that we have configured in the Recovery Services vault after a week.
Please go through the Azure SQL Database – Restore DB from Long Term Retention backup article to learn about how to restore the database.
Summary
- Created a new Recovery Service vault.
- Configured the SQL server to the Recovery Service vault.
- Create a retention policy
- Select the databases which you would like to attach the retention policy of the Recovery Services vault.
Hope you enjoyed reading the article. Your feedback is appreciated.

How to get a daily backup instead of weekly?
LikeLike
Hello,
This is good informative post of azure backup and recovery with their screenshot. Thank
LikeLike