In our following previous articles, we have learned the following.
Azure provides the following three tiers for Redis Cache.
- Basic
- Standard
- Premium
Premium tier provides multiple additional features. In this article, we will learn how to configure Enhanced Security for Azure Redis Cache by isolating the access to Redis Cache within the Virtual Network (VNet).
You can learn more about VNets in one of my previous articles Azure – How to build Virtual network (VNet) and its components
Please note that, by default, all the three tiers provide security to the Azure Redis Cache service by securing the access to the clients with a valid Keys. At any point of time, if you feel that these keys are compromised, you can regenerate the Keys to make the old keys invalid.
However, if you would like to provide enhanced security and don’t want to provide access to the public internet, you can provide network isolation and make sure that the Azure Redis cache is only accessible to the Services that are internal to the VNet. Let’s see how to implement that.
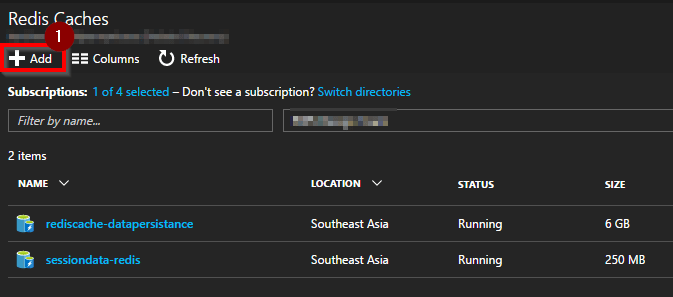
Please navigate to the Azure Management Portal and click on Add as shown in the below screen capture.
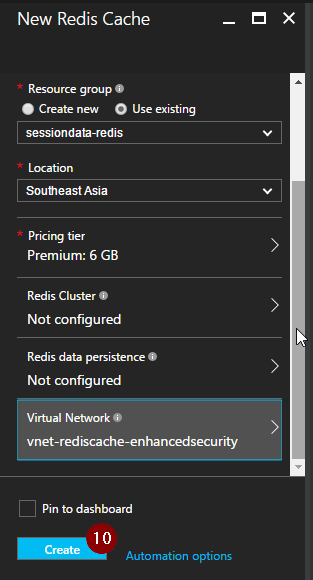
You will be taken to the New Redis Cache blade as shown below.

You must choose one of the available premium tiers. In this example, I have selected P1 Premium tier. Once you select the required tier, click on Select. The next step is to configure the Virtual Network in which you would like to host and use the Redis Cache.
Please note the following.
- You can configure Virtual Network only while creating the Azure Redis Cache. You cannot assign a network after it is created.
- You can configure only the VNets located in the same data center (location) as with the Azure Redis Cache.
- Please make sure that you are selecting an empty Subnet within the selected VNet. You can host the Azure Redis Cache in an empty subnet. You cannot even host other services in this subnet later.
As shown in the below screen capture, select the Virtual Network in which you would like to create the Azure Redis Cache.

Once you select the required Virtual Network, you would see the subnets available within the selected VNet as shown below.
Please select the Subnet and provide an IP Address as shown below.
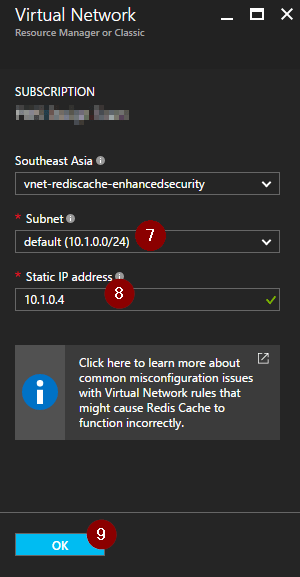
Now, click OK to create the Azure Redis Cache with Enhanced security by provisioning the service within a VNet so that only the services within the VNet can access the Azure Redis Cache.
That’s it. We have created the Azure Redis Cache in a Virtual Network that provides enhanced security.
Summary: In this article, we have learnt the following.
- How to provide enhanced security for an Azure Redis Cache.
- Prerequisites of configuring the Azure Redis Cache in a VNet.
Hope you enjoyed reading the article. Your feedback is appreciated.
Discover more from Praveen Kumar Sreeram's Blog
Subscribe to get the latest posts sent to your email.

2 comments